The Pull of Gravity: Guided Reading Level F with Lesson Plan


ELA, Resources for Teachers, Reading Comprehension, Reading, Science, Language Development, Vocabulary, Physics, Earth and Environmental Sciences, Pre-Reading
Kindergarten, Grade 1, 2
Worksheets & Printables, Worksheets, Teacher Tools, Centers, Activities, Literacy Readers, Quizzes, Quizzes and Tests, Assessments, Lesson Plans
About This Product
This The Pull of Gravity (level f) guided reading book with lesson plan includes:
Guided Reading Color Label (front cover x1)
This is a quick way to match the book’s demands to what students can generally handle..
The overall goal is to use the level/color to pick books for several smaller groups. To qualify for a certain level, a student is expected to read a book from that level with about 90–94% accuracy.
If a student is consistently accurate and understands, move up a level. If the student is struggling at that level, drop down and add more support.
Each student will improve at completely different rates, but it is generally one of the best ways to check progress across the class.
DOWNLOAD THE CATALOG TO VIEW ALL GUIDED READING BOOKS AVAILABLE (SORTED LEVELS A-Z)
COMPANION VIDEO NOW AVAILABLE (EMBEDDED AFTER PREVIEW PICTURES IN PRODUCT DESCRIPTION)
Pre-Reading Question (x1)
The teacher says the question aloud, either while showing the cover or the first page.
Students share what they already know or make sensible guesses based on the cover. Encourage them to use the target vocabulary where possible.
Write a few of their ideas on the board so you can return to them during or after the reading.
Vocabulary Words (x5)
Introduce the five words one at a time. Say each word aloud, have students repeat it, and then ask if anyone already knows what it means.
Read the meaning together and briefly connect each word to a picture, action, or gesture so it feels more memorable.
Ask students to flip through the book and point to any pages where they spot the vocabulary words.
While reading, pause when one of the words appears, or reread the sentence so students clearly notice and understand it in context.
Optional: Ask students to raise their hands whenever they see or hear one of the new words.
Guided Reading Pages (x10)
Check the book snapshot below for:
Primary topic — decide whether students need a quick introduction or extra background first.
What this lesson teaches best — choose 1–2 key points to focus on during the session.
Learning goals — keep in mind what students should be able to understand or say by the end.
Key vocabulary — review and reinforce these throughout the lesson.
Questions overview — look ahead so you know what students will be asked and whether any extra support is needed.
Run the lesson
You may already have looked at a few pages together, but it can help to revisit some of the pictures first to build meaning.
Depending on your time and how confident the group is with guided reading, you may want to read the whole book aloud to them first.
Students can then whisper-read or partner-read while you listen in. If time allows, you can also read as a group, with each student taking a page.
Use the guided reading prompts to support them, such as:
“Check the picture—does it make sense?”
“Point under the words.”
“Try the first sound.”
“Reread the sentence smoothly.”
It can be helpful to focus more closely on one student each session, rotating over time, so you can better judge whether they are ready to move up or may need more support at their current level.
Comprehension Questions (back cover x3)
This is where you check that students understood the text, not just the words on the page.
Start by letting students answer by pointing to a page or picture and saying a short sentence.
After they respond, follow up with: “Show me where you found that in the text.”
In larger groups, let partners discuss their answer first for 10–20 seconds, then invite 2–3 students to share.
Differentiation tips
Emerging speakers / struggling readers: oral response + pointing
On-level: oral response in a full sentence
Higher: one written sentence or a drawing with labels
Lesson Snapshot
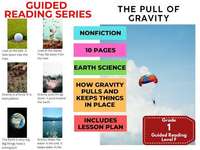
Title: The Pull of Gravity
Genre: Nonfiction (informational)
Subject: Science (Physical Science)
Primary Topic: How gravity pulls things and helps keep them in place
Estimated Guided Reading Level (A–Z): F
What This Lesson Teaches Best
Explains that gravity is a force and that it is all around us.
Shows that gravity pulls things down and toward the Earth.
Uses simple, everyday examples like a ball, leaves, water, rocks, sand, and air to show gravity in action.
Helps students understand that larger objects, like Earth, have a stronger pull.
Introduces the idea that gravity is also in space and helps pull the moon.
Learning Goals
Students will identify that gravity is a force found everywhere.
Students will describe how gravity pulls things down and toward the Earth.
Students will give examples from the text of things gravity pulls or keeps in place.
Students will explain what the text says about Earth’s strong pull.
Students will answer questions about gravity using details from the book.
Key Vocabulary From the Text
gravity — a pull that makes things go down
force — a push or a pull
toward — moving closer to something
space — the place above Earth
mountain — a very high hill of land
Discussion Prompts
Pre-reading question: What do you think makes things fall down to the ground?
Comprehension question: What does the book say gravity is?
Comprehension question: What does gravity pull things toward?
Comprehension question: Name one thing the book says gravity keeps in place.
1. Best Printing Method (Recommended)
Booklet printing is the best option if your printer or PDF viewer supports it.
This method usually places the pages in the correct order automatically and makes folding much easier.
Settings to use:
Print mode: Booklet
Paper size: Letter or A4
Orientation: Landscape
Print on both sides: Yes
Flip on: Short edge
Scaling: Fit to printable area
Booklet subset:
First, print front sides only
Then, print back sides only
This will automatically:
Pair the pages correctly
Place the cover on the outside
Help everything line up properly for folding
After printing, fold the pages in half and staple along the spine.
2. If “Booklet” Printing Is Not Available
You can still print the book correctly by using manual duplex printing.
Step-by-step:
Open the PDF.
Click Print.
Use these settings:
Orientation: Landscape
Pages per sheet: 1
Print on both sides: Yes
Flip on: Short edge
Print all pages.
Since each PDF page already contains two facing book pages, the pages should still fold neatly into a book.
Thousands of Cored Education products are included with your TeachSimple membership.
Download links and encyclopedia index available here.
Resource Tags
0 Reviews
Check out these other great products


