


3,904 products added recently
Writing Graphic Organizers
Support your students in developing their writing skills by providing graphic organizers that assist with planning and structuring. This collection includes essay outlines, narrative planners, and persuasive writing maps. By integrating these tools, you can help students write more coherently and confidently.
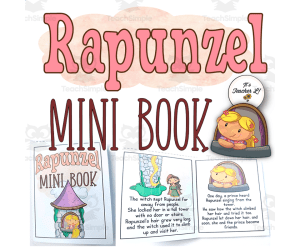
Rapunzel Fairy Tale Foldable Mini Book Grade 1 2 3 ELA
Language Development, ELA, ESL, Children’s Literature, Literature, Reading Comprehension, Reading, Writing, Handwriting, Creative Writing, Grade 1, 2, 3, Centers, Activities, Crafts, Projects, Assessments, Teacher Tools, Graphic Organizers
Look forward to an exciting and meaningful learning experience through this dynamic Rapunzel Mini Bool Pack. Ideal for Grades 1, 2 and 3, homeschoolers, and EFL/ESL learners, this amazing resource is packed with purposeful activities to support different literacy skills including reading, writing, fine motor, storytelling and story re-telling, speaking, listening and so much more! The mini books in this set can be used for reading classes, reading centers, literacy centers, fairy tale units, early finisher additional task, morning work, assessment tool, and more. What’s Included: •Rapunzel Story Mini Book– for story retelling, reading and reading comprehension practice •Rapunzel Story Mini BookTrace & Read Pages– handwriting practice and motor skills exercise •Rapunzel Mini BookSequencing Booklet– sequencing and sorting exercise, story retelling and reading practice •Rapunzel Mini BookRetell & Reflect Pages– retell practice, creativity and imagination development •Rapunzel Mini BookBlank Create-a-Story Templates– story telling, supporting creative and imaginative thinking skills •Rapunzel Mini BookTeacher Guide + Sample Lesson Plan
Author It's Teacher L
Rating
Tags Fairy Tale., Rapunzel, Fairy Tale, Reading Comprehension Project, ELA Project
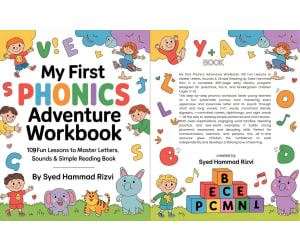
My First Phonics Adventure Workbook 109 Fun Lessons to Master Letters
ELA, Language Development, Literature, Reading, Writing, Phonics, Children’s Literature, Reading Comprehension, Strategies, Creative Writing, Kindergarten, Preschool, Grade 1, 2, 3, 4, 5, Projects, Activities, Teacher Tools, Assessments, Lesson Plans, Presentations, Workbooks, Worksheets & Printables, Literacy Readers, Graphic Organizers
Discover the ultimate preschool and kindergarten phonics workbook called the "My First Phonics Adventure Workbook: 109 fun lessons helping children to master letters, sounds and beginning reading!" This 369-page resource for early literacy education presents a sequentially organized curriculum of phonics skills (i.e., identification of uppercase/lowercase letters; pronunciation of short and long vowel sounds; recognition of CVC words; consonant blend sounds; recognition of diagraph sounds (e.g., "sh," "ch," "th," "wh"); pronunciation of r-controlled vowel sounds; recognition and pronunciation of diphthongs; identification of double consonant letters; recognition and use of sight words; simple sentence/story reading). Written in an easy-to-read and engaging style with many examples of the different types of words for blending activities and everyday application of reading skills, this learn to read workbook provides children with a strong phonemic awareness base and confidence in decoding words when reading. It is great for homeschoolers, teachers, or parents who want to use a comprehensive first-time reader program starting with A-Z letters, and ending with reading comprehension of a whole story; no prior knowledge required; ages 3-6. Improve child reading fluency from an all-inclusive phonics adventure that will support your preschool, Pre-K, or kindergarten child's growth towards success as a reader. Start today by downloading and becoming part of your child's journey toward unlocking the beauty of reading! Why Parents/Teachers Love: Systematic and Comprehensive Coverage — 109 accumulation chapters lead children from single letters to fluent reading of stories — no holes, no additional books needed. Creates True Confidence — Simple explanations with rules of word families and blending activities allow children to independently decode words they have not seen before, providing less frustration to children. Parent and Teacher Friendly — Ready-to-use lessons with examples; works well as a homeschooling, center, or daily practice resource. Proven Early Literacy Base — Phonics standard based and result driven methods that predict long-term success of reading. Affordable and All-in-One Resource – One download replaces more than one costly workbook and offers high quality profession instruction. Target Audience: This workbook is designed for children ages 3–7 in preschool (Pre-K) or early grade 1. Pre-k – Ideal for teaching children to recognize the letters of the alphabet, the sounds they make, and the beginning of their ability to read (Chapters 1-33). Kindergarten – This workbook provides a variety of activities that correlate to the core objectives found in the K-12 English language arts curriculum such as: recognizing and reading short/long vowel sounds, identifying consonant blends/digraphs, and writing simple sentences (Chapters 34-102). Early Grade 1 – This workbook can be used to reinforce and build on skills associated with r-controlled vowels, diphthongs, sight words, and text comprehension (Chapters 103-109). This workbook’s skills are foundational and will assist children who are developing as readers; however, the skills may be too easy for students in 2nd grade and above. Copyright Notice / Terms and Conditions: This Book is owned by Syed Hammad Rizvi. The Book is intended for personal use and only in one classroom. It may not be modified or sold by you, nor may it be distributed over the internet for others to download. If you would like to share the Book with your coworkers, please purchase more licenses for the Book on Teachsimple. Thank you for respecting these terms of use. Syed Hammad Rizvi is pleased to provide you with this product.
Author Creative Book Store
Rating
Tags Phonics, PhonicsFun, PhonicsForKids, PhonicsActivities, EarlyLiteracy, EarlyReading, LearnToRead, ReadingSkills, Literacy, ScienceOfReading

A Student's Guide to Writing a Persuasive Essay
ELA, Writing, Formal Writing, Homeschool Templates, Grade 4, 5, 6, Graphic Organizers, Teacher Tools, Lesson Plans, Templates
Opinion Writing Unit | Step-by-Step Persuasive Essay Guide | Writing Workshop | Grades 3-6 Help your students become confident writers with this step-by-step Opinion Writing Unit. This is all on Google Slides to help students in upper elementary learn the process for typing a multi-paragrpah persuasive essay. Perfect for grades 3-6 . This resource walks students through every stage of the writing process, starting with brainstorming and ending with publishing! What’s Included: Step-by-step writing guide to guide students through opinion writing Graphic organizers and brainstorming Mini-lessons on thesis statements, supporting reasons, and conclusions Example essays and writing samples Checklists and rubrics for self-assessment and teacher grading Editable Google slides to fit your teaching style Why Teachers Love This Unit: Step-by-step writing approach makes opinion writing manageable Supports key writing standards Versatile use! Use this for whole-class instruction, small groups, or individual support Perfect For: Grades 3, 4, 5, and 6 Writing workshops or language arts centers Preparing students for ELA state testing This Opinion Writing Unit gives you everything to confidently teach persuasive writing. Download today and make persuasive writing a highlight of your ELA curriculum! Enjoy! Stephanie | The Language of Learning
Author The Language of Learning
Rating
Tags Opinion Writing, Creative Writing, Student Guide, Persuasive Essay, Graphic Organizers

High School The Outsiders 4-Week Unit Study (Growing Bundle)
ELA, Literature, Reading, Writing, Research, High School, Homeschool Resources, Teacher Tools, Assessments, Graphic Organizers, Lesson Plans, Outlines, Presentations, Quizzes and Tests, Rubrics, Worksheets & Printables, Writing Prompts
Homeschooling a high schooler is a completely different ballgame, isn’t it? I quickly realized that my teenager could spot pointless busywork a mile away—and honestly, they just do not tolerate it. I needed something that fulfilled those necessary high school academic requirements but actually got my teen talking. That frustration is exactly why I built this f our-week unit study for The Outsiders . I originally designed it to take the planning pressure off my own shoulders while offering the kind of mature, respectful academic challenge that older kids appreciate. We skip the repetitive, surface-level comprehension questions here. Instead, this unit targets the messy, real-world themes that high schoolers actually care about: class divides, identity, and the intense pressure to belong. Because the daily layout is already completely organized for you, you can stop stressing over Sunday night lesson planning. Instead, you get to just sit down at the table and dive into great book discussions with your student. This High School The Outsiders Unit Study study was a genuine labor of love in our own home. My hope is that it gives you back your prep time and turns your literature hours into something you both actually look forward to each day. INCLUDED IN THIS RESOURCE: Daily roadmap for structured learning. 6-part test, rubrics, and grading keys. 20 deep-thinking prompts and essay topics. Note-taking sheets, projects, and progress trackers. TOPICS COVERED: Greasers vs. Socs class analysis. Exploring adolescent pressure and growth. Symbolism, narrative voice, and theme. Investigating self-concept and belonging. Whether you need a solid foundation for a high school literature credit or a meaningful supplemental deep dive, this growing bundle bridges the gap between academic rigor and true heart. It challenges older students/homeschoolers to think critically and dissect the complexities of Hinton’s iconic narrative, while giving you back hours of your precious weekly prep time. If you and your students/homeschoolers enjoyed this unit study, please leave a review. Thank you for your continued support! Tina - Big Easy Homeschooling Mom
Author Homeschool with Big Easy Homeschooling Mom
Rating
Tags The Outsiders Study Guide, S.E. Hinton Unit, Literature Analysis Materials, High School Novel Study, Greasers And Socs Analysis, English Literature Deep Dive, Dolescent Identity Literature, Sociopolitical Literature Unit, English Study Guide, Thematic Analysis

COMBINED: The FIVE Elements of a Story Graphic Organizers
ELA, Reading, Reading Comprehension, Language Development, Pre-Reading, Writing, Not Grade Specific, Teacher Tools, Graphic Organizers
This BUNDLED resource includes ALL Graphic Organizers from our The Five Elements of a Story series. This set includes custom graphic organizers for Character, Setting, Plot, Theme and Conflict. An additional 5 BONUS graphic organizers are included. These graphic organizers can be used in any classroom, for any grade, and with any student. Use these graphic organizers to help students gain an understanding of the five elements of a story. Each graphic organizer comes with instructions on how to use them. Character Graphic Organizers: Character Map - Write the name of the character in the middle circle. Then, describe the character’s actions in the top left square; what the character says and how they speak in the top right square; the character’s feelings in the bottom left square; and what the character looks like in the bottom right square. Character Trait Chart - Choose a character from the story. In the first column, write down any traits that your character has. Include physical features, personality, feelings, and anything else that describes your character. In the second column, provide evidence from the story to support your chosen trait. Character Feelings - In the top box, describe the character’s feelings at the beginning of the story. In the next series of boxes, describe an event that has an effect on the character, then how this character feels as a result of this event. In the last box, describe the character’s feelings at the end of the story. Relationship Web - Write the name of the main character in the story in the middle circle. In the circles branching out from the middle one, write down the relationships the character has. Include whether you think this is a good relationship or a bad one. Do the same for any other character in the story. Character Comparison - Use the Venn Diagram to compare two characters from the story. Write the names of each character in the overlapping circles. Write any differences the characters have with one another in the outside circles. Write any similarities the characters have in the middle of both circles. Character Scrapbook - Create a scrapbook for one of the characters in the story. Choose a character from the story. Choose some important events that happen in the story that shapes the character. Draw pictures of these events and explain what happened and how it affected the character. Character Analysis - Keep track of every character in the story and their traits. Write the name of each character in the story in the first column. Write a trait that the character has in the second column. In the third column, write down the page and paragraph number of a quote that proves this trait. Character Development - Choose a character from the story. Write down their initial thought on a topic or situation in the first column. In the second column, write down the event that has an effect on that character’s thoughts. Then, write down the character’s new thoughts on the topic or situation in the third column. Character Cluster - ‑is Cluster Map can be completed in many different ways. Start with a character in the middle triangle. Then, branch out from the character with related topics in the circles. Expand on those topics in the rectangles. Suggestions include: relationship web, traits web, feelings web. Character Sketch - Complete this Character Sketch of any character in the story by writing what the character says, thinks, hates, loves, owns, does or uses. Also include the characters strengths and weaknesses, and where the character has come from in the story, and where the character is going. Setting Graphic Organizers: Setting Elements - Place + Time + Environment = Setting in this Graphic Organizer. Describe the Place that the story takes place in the house graphic. Then, describe the Time in the clock graphic. Finally, describe the Environment in the landscape graphic. Setting Stage - Draw the setting that the story takes place in on the stage in this graphic organizer. Be sure to illustrate the time and place that the story takes place in. Also include the environment of the story, and try to show the tone or mood that the setting creates for the story. Changes in Setting - Identify how the Setting changes throughout the story. In the first column, write down when and where the story takes place at the beginning. In the second column, write down when and where the story takes place at the end. Compare the two to show how the setting changed. Setting Comparison - Compare your Setting with the Setting of the story. In the first column, describe your own Place, Time, Environment, and Mood. Then, do the same for the story’s setting in the second column. Finally, compare each element of the setting. What is the same? What is different? Tone and Mood - Where + When = Tone/Mood in this Graphic Organizer. Describe Where the story takes place in the house graphic. Then, describe When the story takes place in the clock graphic. Finally, describe how both of these elements affect the Tone and Mood of the story. Setting Map - Draw a map to show where the story takes place. Include all the important places from the story as the setting changes. As an extra activity, include routes to each place as it happens in the story. Additionally, include the time for each place on your map. Be creative with your drawing. Past, Present, Future - Describe the Setting as it changes throughout the story. In the Past section, write the setting that took place before the story (flashback). In the Present section, write the current setting of the story. In the Future section, write the setting that will take place after the story (flashback). Elements of Setting - Place + Time + Environment + Mood = Setting in this Graphic Organizer. Describe the Place that the story takes place in the top left box. Then, describe the Time in the top right box. Then, describe the Environment in the bottom left box. Finally, describe the Mood in the bottom right box. Character and Setting Comparison - Compare the Characters in the story with the Setting. Write traits that the character and setting share where the circles overlap. Write traits that the character and setting don’t share in the outside circles. Do this for each character and setting in the story. Setting Analysis - Describe each element of the Setting in detail. Describe the setting, how it relates to the characters, and how the characters are in conflict with the setting. Then, identify the tone and mood of the story, how the setting affects it, and how the story would change if the setting was different. Plot Graphic Organizers: Plot Pyramid – Complete this classic Plot Pyramid graphic organizer by writing the Introduction of the story in the bottom left box. Then, describe the Rising Action, followed by the Climax of the story. Finish up with the Falling Action and the Resolution or Conclusion of the story. Sequence – Describe events from the story in sequence. Start off by writing the Initiating Event, or the event that starts off a chain reaction, in the top box. Follow this with the Steps that directly result from this event in order that they occur. Finish up by writing the Final Outcome of this event. Prediction Chart – In the first column, write down what you predicted, or thought would happen in the story. In the second column, write down what actually happened in the story. Continue this format for each event you predict will happen in the story. Storyboard – Illustrate the plot or an event from the story. Draw or describe in detail each stage in the plot or in an event that takes place in the story. Remember, the order of plot development is: Introduction, Rising Action, Climax, Falling Action, and Resolution/Conclusion. Story Structure – Complete the Story Structure by identifying the Introduction, events of the Rising Action, Climax, events of the Falling Action, and the Conflict and Resolution of the story. Then, identify the theme of the story, as well as the setting of the story (where and when the story takes place). Sequence Chain – Describe up to 9 events from the story in the order that they occur. Write the first event in the first box, followed by the second event in the following box, and so on following the chain. It is not necessary to fill in every box with an event. For an extra activity, draw each event in detail. Prediction Tree – In this Prediction Tree graphic organizer, write your question at the base of your tree. On the trunk, write down your prediction to the answer of the question posed. On the branches, write down evidence from the story to support your prediction. Story Cycle – Describe the Introduction of the story in the top right box. Following the cycle, describe the Rising Action next. Then, include the Climax of the story. Follow this with the Falling Action, and finally with the Resolution of the story. Then, describe how the Resolution relates back to the Introduction. Changes in Plot – Identify how the Plot changes throughout the story. In the first column, write down what happened in the beginning of the story. In the second column, write down what happened at the end of the story. Compare the two to show how the plot changed. Do this for every event in the story. Plot Analysis – Describe the Introduction and identify the Point of View. Describe the Rising Action and what’s being Forshadowed if relevant. Identify the Inciting Force and the Climax. Describe the Falling Action and any Suspense that is experienced. Describe the Conclusion and any Symbolism that is present. Theme Graphic Organizers: Inference Clues – Infer the theme and its meaning from the story by using clues the author gives you. Write down clues to the theme in the circles. Then, find the theme based on these clues and write it in the Inference box. Discuss how you were able to come to that conclusion based on the clues from the story. Theme Prediction – Predict what you think the theme of the story will be based only on the cover art, title, and back cover description. Then, support your prediction. Follow this by writing down evidence from the story as you read along. Finally, write down the actual theme and compare this to your prediction. Theme Chart – First identify the main characters, main conflict, and theme of the story. Then, breakdown the theme of the story by first writing down the beginning of the theme. Follow this by writing the development of the theme, then the climax of the theme. Finish off with the resolution of the theme. Theme Comparison – First, write down a list of themes from the story in the first box. Then, compare these themes by writing their differences in the outside circles, and their similarities in the area where the circles overlap. Finally, write down your conclusions based on this information. Theme Tree – Complete the Theme Tree by first writing the theme on the trunk of the tree. Then, include evidence from the story to support the theme on the branches of the tree. Evidence can be in the form of quotes, paraphrasing, descriptions, and drawings. Theme Contrast – This graphic organizer helps with identifying the Theme and not getting it confused with the Plot or Main Idea of the story. Contrast the theme with the plot or main idea by comparing them and listing ONLY their differences in the two columns. Theme Connection – Connect the Theme of the story with Real Life. First, identify the theme of the story and write it in the center triangle. Then, write down examples of the theme from the story in the circles. Finally, write down examples of the theme as they appear in real life in the rectangles. Changes in Theme – Identify how the Theme changes throughout the story. In the first column, write down the theme in the beginning of the story. In the second column, write down the theme at the end of the story. Compare the two to show how the theme changes. Do this for every theme in the story. Theme Identifier – Get help identifying the Theme of a story by answering the questions. Start off by describing what happens in the story. Then, identify the most important event in the story. Explore the characters by identifying how they change and what they learn. Finally, determine what the author is trying to tell you. Theme Analysis – Identify the Theme, analyze its development, and summarize key supporting details. First, write down what you think the author wants you to understand in the triangle. Then, include supporting evidence in the circles. Finally, tell how the author communicates the theme in the rectangles. Conflict Graphic Organizers: Conflict Dissection – Complete this graphic organizer by filling in each quadrant. In the first box, identify the characters of the story. In the next box, identify the time and place of the story. In the third box, identify the problem that takes place in the story. In the last box, identify the solution to the problem. Problems and Solutions Chart – Identify the Problems and possible Solutions with this graphic organizer. First, identify the problem in the first box. Then, identify possible causes of the problem, followed by possible effects of the problem. Finally, identify any possible solutions to the problem based on this information. Conflict Commentary – Summarize the Conflict by first identifying how the conflict starts. Then, identify possible causes of the conflict. At the top, identify the climax of the conflict, or how it comes to a head. Then, identify possible effects of the conflict. Finally, identify the outcome of the conflict. Internal or External Conflict – Determine whether the conflict in the story is internal or external. Internal conflict: a character experiences two opposite emotions or desires. External conflict: a character struggles with an outside force. Find examples of the conflict in the story and add them to the column that most fits. Conflict Type Chart – In the first column, find examples from the story that shows Character against Character. In the second column, find examples of Character against Nature. In the third column, find examples of Character against Self. And finally, in the fourth column, find examples of Character against Society. Conflict Timeline – Complete the Conflict Timeline graphic organizer by breaking down the events for the conflict. Write down the stages of events for the conflict in the boxes on the timeline. Each stage should follow the order in which it took place in the story. Opposing Forces Comparison – Compare two opposing forces in the story with this graphic organizer. First, identify the two forces you will be comparing. Then, identify the struggle between these two forces. List the differences between the two forces in the outside circles. List the similarities where the circles overlap. Conflict Map – Outline the Conflict in the story with this Conflict Map graphic organizer. First identify the conflict of the story in the top box. Then, identify the two forces that are in conflict with each other, and what happens when these two forces collide. Finally, identify the resolution of the conflict. Cause-Effect-Consequences – Identify the cause, effect, and consequences of the Conflict as it appears in the story. First, identify the conflict in the story in the top box. Then, in the chart, identify the causes of the conflict, the effects of the conflict, and the consequences of the conflict. Conflict Analysis – Determine what type of conflict the author created: Character vs. Character, vs. Nature, vs. Self, vs. Society, vs. Supernatural, or vs. Technology. Answer the questions to lead to the Conflict Statement. Here, identify the type of conflict, what the character wants, and why they can’t have it. Bonus Graphic Organizers: Story Map – Map out the story with this graphic organizer. First list the Characters and describe the Setting of the story in the top boxes. Then, identify the Problem that takes place. Move on to outlining the Major Events of the story. Finally, explain the Resolution and Theme in the bottom boxes. Story Elements – Identify the Story Elements in this graphic organizer. Identify the Theme, Setting, and the Relevance of the Setting. Then, identify the Characters in the story with their names, traits, and function in the story. Move on to identify the Conflict that takes place, the Plot, Climax, and Resolution. Plot and Conflict Analysis – Analyze the Plot and Conflict that takes place in the story. First, identify the Protagonist (hero) of the story, and the Antogonist (villain). Then, identify the Conflict, and what type it is. Complete the Plot Pyramid next. Finally, explain how the Conflict is resolved in the end. Event Map – Breakdown an Event from the story with this graphic organizer. Write down an event from the story in the middle circle. Then, record What happened, When it happened, Where it happened, Who was involved, How it happened, and Why it happened or Why it is important in the circles. Figurative Language – Complete this graphic organizer by finding examples of the selected Figurative Language from the story. Write down examples of Metaphor, Simile, Hyperbole, Imagery, Personification, and Symbolism used in the story. Then, write the page number where you found each example.
Author Ibby Resources
Rating
Tags Study, Skills, Character, Setting, Plot, Theme, Conflict, Literary, Device
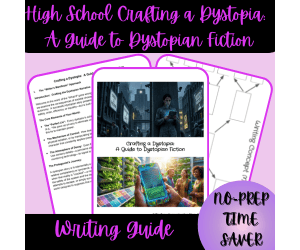
High School Crafting a Dystopia: A Guide For Dystopian Fiction
ELA, Reading, Writing, Research, Resources for Teachers, Homeschool Resources, High School, Assessments, Teacher Tools, Rubrics, Outlines, Graphic Organizers, Worksheets & Printables, Writing Prompts, Lesson Plans, Diagrams
As a homeschool mom myself, I’m always on the lookout for ways to make high school writing both challenging and genuinely fun. That is exactly why I created this High School Crafting a Dystopia: A Guide For Dystopian Fiction unit. Let's be honest—staring at a blank page is intimidating for teenagers, especially when they have to build an entire fictional world from scratch. This High School Crafting a Dystopia: A Guide For Dystopian Fiction resource fixes that by acting as a step-by-step roadmap. It guides your teen from that first spark of an idea all the way to a polished short story. By breaking down the big, scary process of dystopian storytelling into bite-sized pieces, it turns a daunting project into an exciting adventure. Whether your teen is an aspiring novelist or just needs to build confidence in their creative writing, this guide gives them the exact structure they need without crushing their unique voice. I built every single page with the realities of homeschooling in mind. My goal is to completely change how your teen views storytelling, while giving you the peace of mind that you're using a reliable, high-quality resource. INCLUDED IN THIS RESOURCE: Instructional Guides: Step-by-step handbooks for world-building and plot development. Planning Tools: Concept maps and character profile worksheets for organized pre-writing. Writing Prompts: 20 specialized prompts designed to ignite the dystopian imagination. Assessment Pack: Peer review checklists and teacher rubrics for structured feedback. TOPICS COVERED: Dystopian Logic: Defining "Perfect Lies" and the mechanics of societal control. Character Arc: Developing protagonists through internal awakenings and meaningful flaws. World-Building: Using sensory details to establish atmosphere and settings. Narrative Structure: Pacing the hook, rising action, climax, and resolution. Ultimately, this High School Crafting a Dystopia: A Guide For Dystopian Fiction unit is all about helping your homeschooler find their voice and truly master short fiction. It balances clear guidance with plenty of creative freedom, giving young writers the perfect space to grow. You will love how the organized planning tools and straightforward rubrics take the stress out of teaching. By focusing on core skills like world-building and character development, this unit sets your teen up for long-term success. I truly believe that with the right tools, teenagers can write stories that are both deeply thoughtful and technically strong. I am so excited to share this project with your family and see your teen bring their unique world to life. Thank you for letting me play a small part in your homeschool journey. If you and your students/homeschoolers enjoyed this resource, please leave a review. Thank you for your support! Tina - Big Easy Homeschooling Mom
Author Homeschool with Big Easy Homeschooling Mom
Rating
Tags Dystopian Writing, High School English, Creative Writing Lesson, Character Development, Dystopian Fiction Guide, Short Story Project, Dystopian Story Prompts For Teens, , How To Write A Dystopian Short Story, Dystopian Writing Unit For Homeschool, Dystopian Plot Outline Template
How to Write an Essay: Prewriting and Graphic Organizers
ELA, Writing, Common Core, Grade 5, 6, 7, 8, Graphic Organizers, Teacher Tools
**This is the chapter slice "Prewriting and Graphic Organizers" from the full lesson plan "How to Write an Essay"** Take the fear out of writing essays and empower your students by giving them the tools to comprehensively express their point of view. Our workbook provides clear and concise lessons about every stage of the writing process. Based on Bloom’s taxonomy we offer instruction about the four most common types of essays and provide review lessons about verbs, adjectives and pronouns. You can use this material to supplement your present writing program or for independent student work. Also included is a detailed implementation guide, student assessment rubric, word puzzles and comprehension quiz. The six color graphic organizers will assist the introduction of the skill focus and in guiding your students through their successful writing process. All of our content meets the Common Core State Standards and are written to Bloom's Taxonomy.
Author Classroom Complete Press
Tags PDF, What Is A Pre Write For An Essay, Pre Writing Graphic Organizers

Alphabet Tracing Adventures: Interactive Workbook for Early Learners
Montessori, Writing, ELA, Handwriting, Formal Writing, Creative Writing, Resources for Teachers, Classroom Management, Community Building, Special Resources, Kindergarten, Preschool, Grade 1, 2, Teacher Tools, Lesson Plans, Quizzes and Tests, Quizzes, Tests, Activities, Centers, Diagrams, Graphic Organizers, Charts
Unleash the literacy potential of your preschooler with Alphabet Tracing Adventures: Interactive Workbook for Early Learners – the best preschool alphabet tracing workbook to develop handwriting, fine motor skills, and letter recognition in preschoolers. This best, award-winning educational resource includes an in-depth parent and teacher manual on posture, grip, and kinesthetic skills; fun pre-writing exercises with tracing straight, zig-zag, and curved lines to develop muscle memory; step-by-step tracing instructions for uppercase letters (A-Z) with emphasis on graphomotor accuracy and spatial relationships; and guided tracing of lowercase letters (a-z) with emphasis on proportional accuracy and fluid motion. Full of interactive tracing pages, arrows, tips, and pictures, this 37-page digital printable workbook transforms learning into an adventure, ideal for homeschool preschool, kindergarten preparation, or literacy centers in preschool and kindergarten classrooms. Great for developing eye-hand coordination, bilateral integration, and mastery penmanship in toddlers and preschoolers. Get this SEO-optimized preschool handwriting practice PDF today for endless reusable fun – keywords: alphabet tracing worksheets preschool, fine motor skills activities kids, early literacy workbook printable, handwriting practice sheets toddlers, preschool letter recognition games. Why Parents/Schools Love It: Expertly Guided Development: Comes with comprehensive parent/teacher manuals on posture, tripod touch, and fine motor skills to promote proper use and avoid typical handwriting problems for lifelong success. Engaging and Fun Design: Transforms tracing activities into an "adventure" with arrows, pictures, and short, frequent intervals to keep young students engaged and motivated without overloading their short attention spans. Comprehensive Skill Development: Encompasses pre-handwriting exercises, uppercase, and lowercase letters with step-by-step stroke development to develop eye-hand coordination, muscle memory, and bilateral integration in a fun and organized manner. Flexible and Reusable: Digital printable format ideal for homeschooling, classroom, or home practice, emphasizing process over product to instill confidence in young students. Award-Winning Quality: High-quality premium version with effective educational approaches, making it a reliable tool for improving literacy readiness and fine motor skills. Target Student Classes : With a comprehensive understanding of the PDF, including its teaching framework, developmental aspect of fine motor skill coordination, pre-writing skills, and basic stroke-writing letter formation (uppercase A-Z and lowercase a-z), this workbook is specifically designed for preschool children aged 3-5 years. The developmental milestones covered in this workbook, such as the transition from gross to fine motor skills, are also aligned with preschool developmental programs. This workbook may also be used for early kindergarten children aged 5-6 years, but not for higher classes. Copyright/Terms of Use: This Book is copyrighted by Syed Hammad Rizvi. This resource is for personal and single classroom use only. You may not alter, redistribute, or sell any part of this resource. In other words, you may not put it on the Internet where it could be publicly found and downloaded. If you want to share this resource with colleagues, please purchase additional licenses from Teachsimple. Thank you for respecting these terms of use. This product is happily brought to you by Syed Hammad Rizvi
Author Creative Book Store
Rating
Tags PreschoolAlphabetTracing, AlphabetTracingWorkbook, EarlyLearnersLiteracy, HandwritingPracticeKids, FineMotorSkillsActivities, PreschoolTracingWorksheets, InteractiveAlphabetWorkbook, KindergartenReadiness, HomeschoolPreschoolActivities, LetterTracingForToddlers

READING-COMPREHENSION | HUMAN BODY | 20 FREE PAGES
Reading, ELA, Writing, Adult Education, Elementary, High School, Homeschool Resources, Middle School, Not Grade Specific, Anchor Charts, Teacher Tools, Assessments, Quizzes and Tests, Graphic Organizers
READING-COMPREHENSION | HUMAN BODY | 20 FREE PAGES SUMMARY OF THIS PRODUCT: · Document Title: READING-COMPREHENSION | HUMAN BODY · Number of Pages: 20 · File Format (PDF, Word, PPT): PDF · Color or Black & White: COLOR ABOUT THE AUTHOR: At EDITORIAL ARENAS EDUCATIVAS, we believe that learning should be as fun as playing. That’s why we create educational materials that spark children’s curiosity and creativity. I invite you to check out my educational store and discover the wide range of resources that can transform your classes. MAIN INFORMATION OF THIS PRODUCT: What is the name of the product? Hello! Thank you so much for being interested in this beautiful and fabulous product that you can use with your children, both at school and at home. The name of this fabulous product is:READING-COMPREHENSION | HUMAN BODY How many pages does it include? This educational document, carefully created and in some cases compiled, has the following number of pages: 20 What format is it in (A4, letter, digital, printable)? This educational resource is designed in A4 format and PDF, so you will have no difficulties printing it and it will also stay well-protected. A4 PDF Is it in black and white or in color? This document is available in black and white as well as in color. Actually, it combines both, making it more attractive for your students. COLOR SECONDARY AND COMPLEMENTARY INFORMATION: What type of resource is it (activities, guide, set, bundle, workbook)? This resource, like many others, can be an activity or a guide. I also invite you to visit my educational store, where you will find a variety of resources such as games, worksheets, and assessments. For what age, grade, or school level is it ideal? I usually create resources for early grades (children ages 3–5), but I also design for primary students (ages 7–12). My priority is to make children’s learning creative. What learning area does it focus on? This and all my resources focus on children’s essential learning, such as math and literacy. Occasionally, I also create resources for Spanish. What will students learn or practice with it? With this educational resource, children will be able to practice basic skills in math and literacy. Teachers can also adapt it to other learning areas, since learning is multidisciplinary.
Author EDITORIAL LAURA EDUCA
Rating
Tags FREE, FREE RESOURCES, ANCHOR CHART, READING, READING AND COMPREHENSION, COMPREHENSION, HUMAN BODY
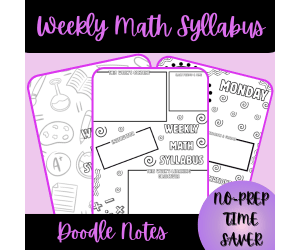
Weekly Math Syllabus Doodle Notes
Creative Arts, Graphic Arts, ELA, Writing, Resources for Teachers, High School, Homeschool Resources, Middle School, Teacher Tools, Graphic Organizers, Outlines, Templates, Worksheets & Printables, Writing Prompts
Transform your mathematics teaching with these dynamic Weekly Math Syllabus Doodle Notes . As a homeschool mom to a creative teenager, I thoughtfully crafted these to make math planning more organized, effective, and visually engaging. These innovative planning templates bridge the gap between logical mathematical thinking and creative visual organization, providing a comprehensive system for documenting and planning your students'/homeschoolers' weekly math curriculum. The unique doodle note format combines structured planning spaces with visual elements that enhance information retention and make the planning process enjoyable for educators while creating clear expectations for students/homeschoolers. INCLUDED IN THIS RESOURCE: Comprehensive weekly math planning template with visually engaging design Designated spaces for learning objectives, content focus, and instructor information Daily sections for documenting classwork, quizzes, tests, and attendance Specialized "Topics to Cover" sections specifically designed for math curriculum Homework planning areas with assignment tracking and website research spaces Visual note-taking spaces that encourage creative organization of mathematical concepts Writing prompt sections to encourage mathematical reasoning and explanation. Give a boost to your mathematics instruction with these Weekly Math Syllabus Doodle Notes , combining logical organization with visual creativity for a more effective teaching experience. These thoughtfully designed templates transform the potentially overwhelming task of mathematics curriculum planning into an organized, engaging process that benefits both educators and students/homeschoolers. Doodle notes are proven to enhance engage and creativity for any subject! If you and your students/homeschoolers enjoyed this resource, please leave a review. Tina - Big Easy Homeschooling Mom
Author Homeschool with Big Easy Homeschooling Mom
Rating
Tags Visual Aids, Visual Learning Tools, Math Planning, Visual Math Teaching , Math Syllabus, Math Doodle Notes, Math Curriculum Organizer, Weekly Planning Templates, Math Resources, Creative Math Resources
How to Write a Paragraph: Using Graphic Organizers for Drafting
ELA, Writing, Grade 5, 6, 7, 8, Graphic Organizers, Teacher Tools
How to Write a Paragraph: Using Graphic Organizers for Drafting An invaluable resource for mastering the art of paragraph writing, carefully crafted to equip learners with the fundamental skills needed to express their thoughts coherently in well-scripted sentences and paragraphs. About the Workbook This comprehensive workbook provides diverse opportunities for students across grades 5 to 8. It supports them as they navigate through prewriting stages using multi-faceted graphic organizers. It revolves around four primary types of paragraph forms, encouraging students to constructively manage their ideas, ensuring an effective drafting structure. Learning Incorporation & Versatility The guidelines provided align flawlessly with Bloom’s Taxonomy aiming at building higher-order thinking skills which are essential in today's education environment. This versatile resource can be incorporated into existing reading programs or used as self-guided student work. Its subject matter focuses on language arts and writing - however, the lessons learnt can easily be transposed across many other subjects. Inclusivity & Engagement Inclusivity plays a significant role; therefore it comes with six bright engaging graphic organizers aimed at simplifying complex concepts while grabbing attention making learning fun yet impactful. The product also includes additional perks such as an implementation guide offering tips and tricks on how best educators can employ this resource in different settings like whole group instruction, small study group activities or even homework assignments leading towards improvement. It also carry a student assessment rubic along with word puzzles for vocabulary enhancement and comprehension quizzes providing ample opportunity for reinforcement and evaluation purposes. Note: This extensive lesson plan comes saved as a PDF file ensuring compatibility across various platforms without compromising layout integrity or losing content quality. Recognize your student’s potential by introducing them to How to Write a Paragraph: Using Graphic Organizers for Drafting - A simplistic tool designed purely on successful teaching fundamentals making writing less daunting and a lot more enjoyable.
Author Classroom Complete Press
Tags PDF

Weekly ELA Syllabus Doodle Notes
ELA, Writing, Resources for Teachers, High School, Homeschool Resources, Middle School, Worksheets & Printables, Writing Prompts, Teacher Tools, Graphic Organizers, Outlines, Templates
Imagine jazzing up your language arts planning with these Weekly ELA Syllabus Doodle Notes . They are not just templates; they are a fun way for teachers and students alike (including homeschoolers!) to dive into learning. Think of them as beautifully designed organizers that blend pictures with practical planning. T his combo makes mapping out your ELA curriculum not only work better but also feel more enjoyable. Each page gives you neat spots to jot down what you're doing each day, assignments, what you're reading, and writing ideas – all sprinkled with cool visuals that help things stick and get those creative juices flowing. INCLUDED IN THIS RESOURCE: ✔Comprehensive weekly ELA planning template with visually engaging design ✔Designated spaces for ELA learning objectives, content focus, and instructor information ✔Daily sections for documenting classwork, discussions, quizzes, and attendance ✔Specialized reading assignment sections for texts and primary sources ✔Homework planning areas with website research recommendations and writing prompts ✔Visual note-taking spaces that connect concepts with creative representation ✔Structured organization that accommodates the unique narrative nature of ELA instruction I've poured a lot of thought into these templates, and my hope is that they will become your go-to for language arts planning – the kind of tool that makes sure you don't miss a thing and actually makes the process a little bit of fun! You will probably find that the straightforward design helps you set clear expectations for your students (or homeschoolers), and they, in turn, will dig the visual bits that make lessons more interesting and easier to remember. Seriously, everything you need for a full ELA experience fits nicely into one good-looking and useful resource. Whether you're a seasoned homeschooling pro or just starting out as a teacher, I think you will find these templates hit that sweet spot of being organized without cramping your style. Let's shake up your language arts planning with my Weekly ELA Syllabus Doodle Notes ! I have mixed practical organization with visual learning tricks that really do the job – helping you make plans that keep everyone focused, boost memory, and get your students (or homeschoolers) more involved. Y ou might even find yourself looking forward to planning, which is saying something! Your students/homeschoolers will appreciate knowing what's coming each week, and you will love having all your ideas in one place with a bit of creative flair. Go ahead and treat yourself to this planning upgrade and see how it can bring a fresh vibe to your language arts teaching – getting organized has never felt so good! If you and your students/homeschoolers enjoyed this resource, please leave a review. Thank you for your support! Tina - Big Easy Homeschooling Mom
Author Homeschool with Big Easy Homeschooling Mom
Rating
Tags ELA Doodle Notes, ELA Organization, Visual Aids, Visual Learning Tools, Syllabus Templates, Creative Teaching Tools, Doodle Notes, ELA Planning, Weekly Planning Template, ELA Weekly Planning

High School Edgar Allan Poe Unit Study on Gothic vs. Modern Horror
ELA, Literature, Reading, Writing, Research, Resources for Teachers, High School, Homeschool Resources, Teacher Tools, Assessments, Graphic Organizers, Lesson Plans, Outlines, Presentations, Quizzes and Tests, Rubrics, Templates, Worksheets & Printables
Bring the Chills to Your High School Literature Study As a homeschool mom, I know firsthand how tough it is to find high school English curriculum that is both truly rigorous and actually interesting to teenagers. That is exactly why I created this High School Edgar Allan Poe 2-Week Unit Study . I wanted to bridge the atmospheric, classic dread of Poe with the sharp, modern psychological tension of authors like Shirley Jackson. This is not just about reading spooky stories for fun—we are digging into the actual mechanics of how authors craft fear across different literary eras. It is a completely no-prep unit that keeps my own daughter excited to open her books every single morning! What You Get in This Resource: Detailed 2-week lesson plans Comprehensive student handouts Complete grading rubrics and answer keys A ready-to-use PowerPoint presentation Core Skills & Topics Covered: Foundations of Gothic horror vs. modern psychological suspense Comparative literary analysis Formal essay writing By the end of these two weeks, your students/homeschoolers will have tackled complex, eerie texts, constructed a strong thesis statement, and learned how to back up their arguments with evidence. I have also included a built-in peer review process to help them learn how to give and receive constructive feedback in a supportive way. You will be amazed at the deep, thoughtful conversations this unit sparks—taking your high schooler way beyond simple plot summaries and right into higher-order critical thinking. If you and your students/homeschoolers enjoyed this unit study, please leave a review. Thank you for your continued support! Tina - Big Easy Homeschooling Mom
Author Homeschool with Big Easy Homeschooling Mom
Rating
Tags Edgar Allan Poe Unit, Gothic Horror Lessons, Modern Horror Literature, Horror Genre Study, High School English Resources, Gothic Vs Modern Horror, Poe Analysis, Shirley Jackson Lesson, Comparative Literature Unit, Horror And Mystery Genre

OREO Opinion Writing – 10 Graphic Organizers
Writing, ELA, Language Development, Grammar, ESL, Grade 2, 3, 4, 5, Worksheets & Printables, Centers, Activities, Graphic Organizers, Teacher Tools
These graphic organizers help kids in grades 2-5 write better opinion pieces. When students need to write about what they think, these templates make it much easier. This set is in a PDF format and printable. It consists of 10 pages of worksheets. The main organizer uses OREO (Opinion, Reason, Evidence, and Restate). It's a simple way for kids to remember all the parts they need in their writing. Just like the cookie! You also get a pros & cons chart so students can think about good and bad points before they decide what they think. There's a Fact vs. Opinion Chart that helps kids tell the difference between what's real and what someone thinks. The Persuasive Writing Map guides students to develop a clear beginning, middle, and end. The Paragraph Frame provides sentence starters to get their ideas flowing. These work great for writing time, centers, small groups, or when kids work alone. Just print them out and you're ready to go. Use them for regular classwork, homework, or even tests. The best part? Kids actually understand how to use them. They break down opinion writing into small, easy steps. #OpinionWriting #PersuasiveWriting #OREOWritingStrategy #WritingGraphicOrganizer #ParagraphWriting #FactandOpinion #ProsandCons #WritingFrames #LiteracyCenters #WritingActivities #Elementary #Grade2 #Grade3 #Grade4 #Grade5
Author Cutie worksheets986
Rating
Tags Opinion Writing, Persuasive Writing, OREO Writing Strategy, Writing Graphic Organizer, Paragraph Writing, Fact And Opinion, Pros And Cons, Writing Frames, Literacy Centers, Writing Activities

SUPER PACK | 10 FREE READINGS | TEXT+QUESTIONS+ANCHOR CHARTS
Reading, ELA, Writing, Adult Education, Elementary, High School, Homeschool Resources, Middle School, Not Grade Specific, Early Learning, Anchor Charts, Teacher Tools, Assessments, Charts, Graphic Organizers, Quizzes and Tests, Workbooks, Worksheets & Printables
SUPER PACK | 10 FREE READINGS | TEXT+QUESTIONS+ANCHOR CHARTS ABOUT THE AUTHOR: At EDITORIAL ARENAS EDUCATIVAS, we believe that learning should be as fun as playing. That’s why we create educational materials that spark children’s curiosity and creativity. I invite you to check out my educational store and discover the wide range of resources that can transform your classes. MAIN DESCRIPTION: What is the name of the product? Hello! Thank you so much for being interested in this beautiful and fabulous product that you can use with your children, both at school and at home. The name of this fabulous product is: SUPER PACK | 10 FREE READINGS How many pages does it include? This educational document, carefully created and in some cases compiled, has the following number of pages: 200 What format is it in (A4, letter, digital, printable)? This educational resource is designed in A4 format and PDF, so you will have no difficulties printing it and it will also stay well-protected. PDF A4 SUMMARY OF THIS PACK: What is the name of the document?: SUPER PACK | 10 FREE READINGS How many pages does it include?: 20 In what format is it available (PDF, Word, PPT)?: PDF Is it in color or black and white?: COLOR EXTRA INFORMATION: What type of resource is it (activities, guide, set, bundle, workbook)? This resource, like many others, can be an activity or a guide. I also invite you to visit my educational store, where you will find a variety of resources such as games, worksheets, and assessments. For what age, grade, or school level is it ideal? I usually create resources for early grades (children ages 3–5), but I also design for primary students (ages 7–12). My priority is to make children’s learning creative. What learning area does it focus on? This and all my resources focus on children’s essential learning, such as math and literacy. Occasionally, I also create resources for Spanish. What will students learn or practice with it? With this educational resource, children will be able to practice basic skills in math and literacy. Teachers can also adapt it to other learning areas, since learning is multidisciplinary.
Author EDITORIAL LAURA EDUCA
Rating
Tags FREE, FREE RESOURCES, PACK, SUPER PACK, BUNDLE, READINGS, TEXT, ELA, READING, READING AND COMPREHENSION

Haiku Poem Writing Activity Lesson Plan, Interactive Notebook Template
Writing, ELA, Creative Writing, Poetry, Literature, Homeschool Templates, Grade 3, 4, 5, 6, Centers, Activities, Door Decor, Classroom Decor, Graphic Organizers, Teacher Tools, Lesson Plans, Rubrics, Templates, Worksheets & Printables
This Haiku Poem Writing Activity makes poetry fun, structured, and easy to teach - perfect for helping students understand the classic 5-7-5 syllable pattern while buidling confidence in writing. With a ready-to-use lesson plan and interactive notebook templates, your students will be guided step-by-step through the process of writing their own haiku poems. What's Included Detailed Haiku lesson plan Clear explanation of the 5-7-5 syllable structure Student-friendly haiku poem example Interactive notebook templates for hands-on learning Scaffolded writing templates Assessment rubric for quick and consistent marking Why Teachers Love This Resource Haiku poems are a fantastic way to introduce poetry because of their short, structured format. This resource helps students focus on syllables, word choice, and imagery—without feeling overwhelmed. Especially Effective For Reluctant writers who need clear structure Building syllable awareness Developing descriptive language skills Perfect For 3rd Grade (also suitable for Grades 2-5) Poetry units Writing Lessons Literacy Centers Interactive Notebooks Homeschool Learning How You Can Use It Whole-class poetry lesson Small group instruction Independent writing activity Assessment task Fast-finisher work Skills Covered Poetry writing Syllable counting Descriptive vocabulary Sentence construction Creative expression If your students struggle with “What do I write?”—this resource gives them the structure and support they need to succeed.
Author Teach2Tell
Rating
Tags Haiku Poem, Haiku Lesson Plan, Poetry Writing Activity, Haiku Template, Syllable Counting Activity, National Poetry Month , Writing Activity, April Writing Activity, Poetry Lesson, 3rd Grade Writing

The Princess and the Pea Fairy Tale Foldable Mini Book Grade 1 2 3 ELA
ESL, Language Development, ELA, Children’s Literature, Literature, Reading Comprehension, Reading, Handwriting, Writing, Grade 1, 2, 3, Centers, Activities, Crafts, Projects, Assessments, Teacher Tools, Graphic Organizers
Develop the necessary literacy skills of your young learners through this purposefully made The Princess and the PeaMini Book Pack. Created for Grades 1, 2 and 3 students, homeschoolers, and EFL/ESL learners, this resource is designed for reading classes, reading centers, reading comprehension exercises, writing practice, fine motor skills exercises, fairy tale units, supplemental assessment tool, morning work, early finisher additional activities, and so much more! What’s Included: •The Princess and the PeaStory Mini Book– for story retelling, reading and reading comprehension practice •The Princess and the PeaStory Mini BookTrace & Read Pages– handwriting practice and motor skills exercise •The Princess and the PeaMini BookSequencing Booklet– sequencing and sorting exercise, story retelling and reading practice •The Princess and the PeaMini BookRetell & Reflect Pages– retell practice, creativity and imagination development •The Princess and the PeaMini BookBlank Create-a-Story Templates– story telling, supporting creative and imaginative thinking skills •The Princess and the PeaMini BookTeacher Guide + Sample Lesson Plan
Author It's Teacher L
Rating
Tags The Princess And The Pea, Reading Comprehension, ELA Project, Reading Centers

Giraffe Unit Study
Creative Arts, Art, ELA, Reading, Reading Comprehension, Grammar, Language Development, Vocabulary, Spelling, Writing, Science, Life Sciences, Animals, Human Body, Biology, Grade 3, 4, 5, Activities, Crafts, Teacher Tools, Lesson Plans, Presentations, Graphic Organizers, Projects, Assessments, Worksheets & Printables, Worksheets
Giraffe Unit Study The Giraffe Unit Study presents a captivating method to both introduce and expand students' understanding about giraffes. This ready-to-go unit study is structured primarily for elementary teachers and homeschooling parents, enhancing students' knowledge of giraffes through interactive activities. Targeted Learning Styles & Diverse Topics The unit throws light on varied topics such as interactions between giraffes and other species, human impact on their population, scientific research etc which in turn nurtures curiosity in kids. Online presentations with pre-recorded voiceovers for visual and auditory learners Reading passages for bookworms Note-taking pages integrated with graphic organizers for the writers at heart are some of the formats used. Crafting sessions encourage creativity while learning about these fascinating creatures. Inclusive Lessons & Additional Resources All lessons are shaped keeping differential learning styles in mind therefore increasing inclusivity among all students irrespective of their cognitive abilities. The curriculum is further enriched with: Vocabulary word cards paired with dictionary work, Comprehension worksheets from various reading passages, Discussion questions following each lesson as well as regular assessments to keep track of student's comprehension skills. Cross-Curricular Subjects & Scientific Insights Included! The hands-on activities like crafting not only demand active participation but also creatively connect Art (drawing), English language arts along with geography - all seamlessly woven together! It also introduces key scientific topics such as anatomy & physiology providing valuable insights into giraffe adaptations because every learner deserves to know how unique these grassland inhabitants are! The exploration into conservation and scientific research is a cherry on top! Fuel for Imagination & Independent Thinking The avenues of usage include group exploration outdoors, small group discussions, individual homework assignments or even co-reading sessions. The possibilities are limitless! With the Giraffe Unit Study, every aspect has been carefully planned out with each young learner's academic journey at the heart because education should never be mundane and it won't be, thanks to this unit.
Author Heather Huhman
Tags Giraffes, Unit Study, Interactive Activities, Science Education, Conservation Efforts
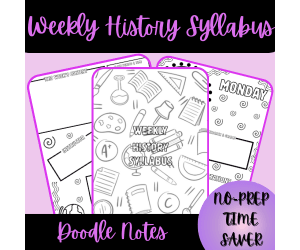
Weekly History Syllabus Doodle Notes
Creative Arts, Graphic Arts, ELA, Writing, Resources for Teachers, History, Social Studies, High School, Homeschool Resources, Middle School, Worksheets & Printables, Writing Prompts, Teacher Tools, Graphic Organizers, Outlines, Templates
Ever feel like your history lessons need a serious pick-me-up? After watching my teenager's eyes glaze over during one too many timeline activities, I knew I had to create something different! These Weekly History Syllabus Doodle Notes were born late one night at my kitchen table, surrounded by scattered history books and half-finished lesson plans that weren't working for either of us. As a fellow homeschool mom who's navigated the treacherous waters of teaching history to a teenager (who'd rather be doing ANYTHING else), I have poured all my real-world experience into these templates. Gone are the days of dry, boring history planning that puts both of us to sleep! Instead, I have created visual planning sheets that finally clicked for my visually-oriented teen. Now we're mapping out historical connections, documenting primary source readings, and planning research activities in a way that actually sticks! The magic happens when those historical concepts come alive through both organized planning AND creative visual elements. My daughter went from "Do we have to do history today?" to pointing out connections between historical periods on her own—I amnot kidding! These templates have completely transformed how history works in our homeschool, and I cannot wait for them to do the same for yours. INCLUDED IN THIS RESOURCE: Comprehensive weekly history planning template with visually engaging design Designated spaces for historical learning objectives, content focus, and instructor information Daily sections for documenting classwork, discussions, quizzes, and attendance Specialized reading assignment sections for historical texts and primary sources Homework planning areas with website research recommendations and writing prompts Visual note-taking spaces that connect historical concepts with creative representation Structured organization that accommodates the unique narrative nature of history instruction Look, I am not going to pretend I'm some super-organized homeschool mom with color-coded bookshelves (my laundry pile would quickly disprove that myth!). But after years of history lessons that felt like pulling teeth, these doodle notes have honestly saved our homeschool history curriculum. Sunday afternoons used to find me stressed and overwhelmed, staring at history books and wondering how to make centuries-old events relevant to my tech-obsessed teen. Now? I actually look forward to mapping out our history week! The combination of chronological organization with visual creativity means concepts stick in a way they never did before. My daughter has gone from glazed-over eyes to making connections between historical periods on her own. No joke—last week she compared political patterns from ancient Rome to something in today's news WITHOUT PROMPTING! Grab these templates today, and in a few weeks, you will be texting your homeschool friends about how your kid suddenly loves history. (And they'll demand to know your secret!) If you and your students/homeschoolers enjoyed this resources, please leave a review. Thank you for your support! Tina - Big Easy Homeschooling Mom Please subscribe: tidewindacademyhomeschool.com
Author Homeschool with Big Easy Homeschooling Mom
Rating
Tags History Doodle Notes, Visual Aids, Visual Learning Tools, Social Studies Planning, History Syllabus Templates, Doodle Notes, Homeschool History Organization, Homeschool Social Studies Organization Tools, Weekly History Planning Templates For Homeschoolers, Educational Organization

READING-COMPREHENSION PACK | RENEWABLE ENERGY | 20 FREE PAGES
Reading Comprehension, Reading, ELA, Strategies, Creative Writing, Writing, Earth and Environmental Sciences, Science, Elementary, High School, Adult Education, Homeschool Resources, Middle School, Not Grade Specific, Anchor Charts, Teacher Tools, Assessments, Graphic Organizers, Quizzes and Tests
READING-COMPREHENSION PACK | RENEWABLE ENERGY | 20 FREE PAGES ABOUT THE AUTHOR: At EDITORIAL ARENAS EDUCATIVAS, we believe that learning should be as fun as playing. That’s why we create educational materials that spark children’s curiosity and creativity. I invite you to check out my educational store and discover the wide range of resources that can transform your classes. MAIN DESCRIPTION OF THIS RESOURCE: What is the name of the product? Hello! Thank you so much for being interested in this beautiful and fabulous product that you can use with your children, both at school and at home. The name of this fabulous product is: READING-COMPREHENSION PACK | RENEWABLE ENERGY How many pages does it include? This educational document, carefully created and in some cases compiled, has the following number of pages: 20 What format is it in (A4, letter, digital, printable)? This educational resource is designed in A4 format and PDF, so you will have no difficulties printing it and it will also stay well-protected. SUMAMRY OF THIS PRODUCT: What is the name of the document?:READING-COMPREHENSION PACK | RENEWABLE ENERGY How many pages does it include?: 20 In what format is it available (PDF, Word, PPT)?: PDF Is it in color or black and white?: COLOR SECONDARY AND COMPLEMENTARY INFORMATION: For what age, grade, or school level is it ideal? I usually create resources for early grades (children ages 3–5), but I also design for primary students (ages 7–12). My priority is to make children’s learning creative. What learning area does it focus on? This and all my resources focus on children’s essential learning, such as math and literacy. Occasionally, I also create resources for Spanish. What will students learn or practice with it? With this educational resource, children will be able to practice basic skills in math and literacy. Teachers can also adapt it to other learning areas, since learning is multidisciplinary. Who will benefit the most from this resource (teachers, families, students, therapists)? I strongly believe education involves many people—teachers, parents, and even therapists. That’s why this resource is open to anyone involved in the learning process.
Author EDITORIAL LAURA EDUCA
Rating
Tags FREE, FREE RESOURCES, ANCHOR CHART, READING, READING AND COMPREHENSION, COMPREHENSION, RENEWABLE ENERGY

Storyboard Creative Writing Planning Guide
ELA, Writing, Creative Writing, Grade 4, 5, 6, 7, Teacher Tools, Graphic Organizers
This resource is a Storyboard Creative Writing Planning Guide. This resource can be accessed digitally or as a printable. Included are 9 interactive Google Slides to make the writing process engaging and effective all year long.
Author The Language of Learning
Rating 3
Tags Creative Writing, Graphic Organizers, Storyboard, Story Elements, Planning Guide

What are Myths, Fables, Legends, and Fairy Tales?
ELA, Literature, Reading, Writing, Grade 3, 4, 5, Drawing Templates & Outlines, Worksheets & Printables, Worksheets, Graphic Organizers, Teacher Tools, Outlines
Brief Activity Overview: In this activity, your child will explore the unique features of myths, fables, legends, and fairy tales . They will watch a short video and use a chart to organize what they’ve learned about each type of story. At the end of this document, be sure to check out the "Beyond the Activity" section for fun extension ideas if your child wants to dive deeper into these story types or try related lessons. Estimated Time: Less than 1 hour Learning Objective: Understand and identify key features of myths, fables, legends, and fairy tales. Subject: English Language Arts Recommended Grade Levels: 3rd – 6th Getting Started: Exploring Story Types Begin by engaging your child in a simple conversation to spark interest and activate prior knowledge: Tell me about one of your favorite storybooks. Suggested discussion questions are included as great way to ease into the lesson and connect your child’s personal reading experiences to the bigger ideas behind storytelling. Introducing the Activity Discuss how many stories fall into categories such as myths, fables, legends, and fairy tales and what your child knows about them (guiding questions are provided). Then, explain that in this activity, they’ll learn more about each type by watching a brief video and taking notes. Encourage them to pay attention to the key features of each story type and notice how they are alike and different . What to Do Next Watch the Video – Invite your child to watch the short video provided. Take Notes – As they watch, encourage them to jot down what they learn about myths, fables, legends, and fairy tales. Discuss and Reflect – After watching, go over the comprehension questions on the next page. These questions can be used: As discussion starters As writing prompts Or a combination of both—whatever works best for your family! 💡 An answer key is included to support your discussion.
Author Sprout & Inspire
Rating
Tags Reading, Myth, Fable, Legend, Fairy Tale, Graphic Organizer, Quick Activity, Ela
How to Write a Book Report: Graphic Organizers for Non Fiction Book Reports
ELA, Writing, Common Core, Grade 5, 6, 7, 8, Graphic Organizers, Teacher Tools
How to Write a Book Report: Graphic Organizers for Non Fiction Book Reports This teaching resource is an all-in-one solution aimed at engaging both educators and students in the challenging yet exciting endeavor of non-fiction book report writing. Within this comprehensive, 24-page PDF, you'll find all the required tools for helping students in Grades 5 through 8. The Challenge of Teaching Book Reports Writing Tutors may find it daunting to instruct their pupils on how to craft an efficient book report, and such difficulty tends to increase when dealing with non-fiction content. This instructional tool addresses these concerns directly by furnishing step-by-step guidance supplemented with striking graphic organizers. Focusing on Effective Organization and Presentation This resource concentrates on providing learners with concrete methodologies for collating and displaying information about various non-fiction topics encountered during language arts and writing lessons. Teachers can take advantage of these robust tools to facilitate their students' grasp of organized data management during pre-writing stages. Pupil-Efficient Instructions: The teaching aid combats overcomplicated tasks, presenting clear guidance, inclusive of student assessment rubrics and comprehension quizzes promoting seamless understanding among learners. Bloom’s Taxonomy-Based Objectives: Learning goals follow the globally acclaimed Bloom’s Taxonomy framework encouraging advanced cognition as per current educational standards, aligning perfectly with Common Core State Standards. Vocabulary Skill Reinforcement: Ready-to-use word puzzles serve as entertaining interludes while amplifying vocabulary learnt from textbooks, infusing an air of fun into learning activities without compromising educational guidelines. Potential Use Cases across Classroom Activities Educators can choose from multitude options regarding this tool's application. It can be used in numerous techniques ranging from whole-class instructions to small group discussions, outside classroom activities and even individual self-pacing exercises! Concluding Thoughts In essence, tutors seeking engaging methodologies to instruct non-fiction book report writing will find immense value in this aid. The perfect blend of explicit teaching, captivating graphic organizers and extensive student guides makes it a crucial addition to any toolkit. Applying such resource promises simplified yet systematic learning experiences ensuring efficiency at mastering non-fiction book reporting skills.
Author Classroom Complete Press
Tags Language Arts, Writing, Writing A Book Report, Non-fiction Test, Graphic Organizers

Overcoming Temptation Bible Lesson
Resources for Teachers, Research, Life Studies, Reading, ELA, Writing, High School, Homeschool Resources, Middle School, Teacher Tools, Worksheets & Printables, Writing Prompts, Graphic Organizers, Literacy Readers
Let's face it—being a teenager today is tough. That's why I created this Overcoming Temptation Bible Lesson with your students/homeschoolers in mind. I have packed 46 pages with real-talk strategies that are both deeply rooted in Scripture and actually useful in their everyday lives. No stuffy language here—just honest conversation that meets teens where they are while pointing them toward God's truth. As they work through each lesson, they will go from just understanding what temptation is to walking away with their own spiritual game plan they have created themselves. I have worked hard to connect the timeless wisdom of the Bible with what teens actually deal with: the constant pull of social media, complicated friendships and dating relationships, pressures around substances, and those moments when cheating on that test seems like the only option. INCLUDED IN THIS RESOURCE: 46 pages with teen-friendly language and formatting Scripture references from both Old and New Testaments with context explanations Personal reflection questions to promote deeper engagement Practical application strategies students can implement immediately Real-world examples addressing modern temptations teens actually face A customizable personal action plan template for lasting change TOPICS INCLUDED: Defining temptation and its universal nature across all believers Identifying common sources and triggers of temptation for teenagers Examining Jesus' wilderness temptation as a practical example Understanding the progressive nature and dangers of giving in to temptation Implementing Scripture memorization and prayer as spiritual weapons Developing healthy community and accountability relationships When you invest in this Bible study, you are giving teenagers something that goes far beyond a few weeks of lessons—you are helping them build spiritual muscles they will use for life. In a world where teens are bombarded with mixed messages, this resource does not just teach them to say "no" to the wrong things; it helps them embrace a vibrant "yes" to God's best for them. I have carefully crafted both the opening welcome and final send-off to bookend the experience with encouragement that sticks. My goal is that your students/homeschoolers will still be drawing on these biblical principles years from now as they navigate college decisions, workplace ethics, and relationships. There is something powerful about seeing a teenager connect with God's Word in a way that actually makes sense to them—and that is exactly what this resource helps make happen. If you and your homeschoolers enjoyed this resource, please leave a review. Tina - Big Easy Homeschooling Mom
Author Homeschool with Big Easy Homeschooling Mom
Rating
Tags Teen Devotional, Character Development, Spiritual Growth For Teens, Biblical Strategies For Temptation, Biblical Decision-Making, Teenage Spiritual Formation, Bible Lessons For High School Students/Homeschoolers, Christian Character Development, Faith-based Decision Making For Teens, Teen Discipleship Material