
There are 44 phonemes in English. There are 5 vowels and 21 different ways to pronounce them. It’s no wonder learning to read is a lengthy process. It doesn’t have to be difficult, though. Why not use a resource that begins with what the students already know as the basis for learning to read? Why not use a sound wall?
In this post, you’ll learn what a sound wall is and how to create one in your classroom. You will also understand the benefits of a sound wall and how to use it.
Table of Contents
- What is a sound wall?
- Parts of a sound wall
- Why should I use a sound wall?
- How to use a sound wall
- Benefits of sound walls
- Resources to use with sound walls
- Sound Wall FAQs
- Final thoughts
What is a sound wall?
Simply, a sound wall is a wall in the classroom on which the different sounds made in English are displayed. It is a tool for teaching reading that begins with the sound and then moves into print.
It is a feature in a classroom that focuses on the way individual sounds and blends (phonemes) are articulated.
A sound wall begins from the student’s perspective. It is a reflection of what they have learnt to pronounce and the tangible evidence of those sounds.
What is important about the wall is that it begins with the students and what they are familiar with.
Parts of a sound wall
A sound wall is made up of a whole lot of cards that are set out in sets. Each set linked to one phoneme or sound will have four items:
- Phoneme: the letter/s associated with the sound. For example: /ar/ (as in ‘barn’)
- Key icon: a picture of a word containing the sound. (So, a picture of a barn.)
- Spelling: at least one word that contains the phoneme, written out.
Each word should have a small picture of the thing the word refers to.
- Formation of the mouth: a photograph of a child’s mouth as they make the sound ‘ar’.
Before any of this is displayed on the wall, the students are taught the phoneme.
They learn to recognise it in spoken words. (So, they learn the word ‘barn’ verbally.)
Then, the students are taught to pick out the sound ‘ar’ and practise saying it. (They should watch themselves saying the sound in the mirror.)
Only after the process has been gone through, are the elements put onto the wall.
So, a sound wall is essentially the reinforcement of what the students first learn aurally and verbally.
Why should I use a sound wall?
You should use a sound wall because it places the focus of learning to read on the students. Their experience and mastery of spoken language is where the process begins.
We learn language by listening. Moats (2010) describes how it is necessary to know the individual sounds (phonemes) in words before learning to recognize the letters that correspond with them. This means that it is important to teach students to listen to and recognize the phonemes before introducing them to the written representations of the sounds. Only after that should students be taught to read words and then to spell.
This is why a wall like this is so valuable in the process of teaching reading. Displaying the sounds, rather than individual letters that relate to the sounds, helps the learners to understand that there is a connection between them.
As you build up the wall, you have a resource that records the students’ process of learning to read. The children can keep going back to it. You can also direct them to a particular phoneme if they are struggling with it.
Essentially, you should use a sound wall because it is an invaluable tool to use during the whole process of teaching your students to read.
How to use a sound wall
The most important thing to remember when you use a sound wall is to teach the sounds before putting anything on a wall.
The sounds
Begin with one sound. Let the kids practice and see what their mouths do when they make the sounds. They can look in the mirror, use some kind of video or photograph. They can also watch each other, or you as you make the sound. They should imitate their peers or you.
Get the kids to describe what they feel happening in and around their mouths when they say each sound. Choose one of the children to photograph. Take an image of their mouth as they make the sound.
At this stage, put the symbol or letters corresponding with the phoneme on the wall. Above it, put the picture of the student’s mouth.
Guide the students to say the sound in relation to the representation.
The words
Next, put the sound into specific words. Use simple words. I suggest beginning with only one and then moving onto a few others. Do not use any letters or printed versions of the words yet. Teach them to listen for the sound in the words. Use a picture that corresponds to the word.
The letters
You can use a tool like an Elkonin box to help the students link a sound to a particular letter or set of letters. Don’t try to teach all the phonemes in one word. Give the students the other phonemes and encourage them to fill in the missing phoneme.
Put the picture/s of the relevant words on the wall.
For example
Begin with ‘e’ in bed’
Read a simple story to the class that includes the word ‘bed’ often. It should also use the sound ‘e’ in different words.
A story could be something like:
Fred likes his bed. His bed is red. Fred tells his friend about his bed. “My red bed is the best”, Fred said.
Guide the students through looking at how their mouths are shaped when they make the sound. From there, you can go through the process of building up one part of the wall.
Benefits of sound walls
The focus is on the phonemes
Using a sound wall keeps the learning directly on the phonemes. This is the key to teaching reading and spelling. The students first learn to make the sounds, then they can be taught to isolate them and use them in words.
As they progress, they will learn to read words containing specific sounds. Finally, they will learn to spell the words.
And it all begins with the individual sounds.
The key to reading is the letter-sound connections
With a sound wall, your emphasis is on guiding your students to bring together the way they make a sound, how it is spelled and what specific words mean. This means the wall is a perfect map of the process of students learning to read.
Allows for constant reviewing of individual sounds
As we’ve seen, a sound wall is based on the sounds of individual phonemes. It is essentially a record of every sound the students make. As they progress onto a new sound, they are going to encounter at least some of those they have already learnt.
In this way, the wall allows you to guide the learners to revise phonemes they have already worked with.
Creates a visual aid
Despite its name, a sound wall is essentially visual. The pictures and cards you put on the wall become the perfect visual aids to teach and revise words and sounds. You can also use these as the basis for teaching about phonemes and for teaching spelling.
Spelling is developed and mastered
Sound walls offer a step-by-step process of learning to recognise and spell words. This is invaluable in helping students learn to put together letters and sounds so they begin to understand spelling.
By beginning with what they know and developing to the way those sounds are written and words spelled, a sound wall is an invaluable tool to help students master spelling.
The students learn to decode efficiently
Essentially, reading is about decoding symbols. The elements on a sound wall, as well as the process of teaching the students to use them, develop the students’ decoding skills.
How to create a sound wall in your classroom
The first step in creating a sound wall in your classroom is to commit. This may sound crazy, but this wall is a long-term investment. It takes up space and takes time. The returns, though, are wonderful.
Find the space
Classroom wall
There are 44 phonemes in English. Your students need to focus on all of them. This means your sound wall will take up quite a lot of space. In fact, it’ll most probably be best to dedicate a whole wall in your classroom to your sound wall.
Mobile sound walls
The other option is to create a mobile wall. Display boards are very useful, especially as they can be moved out of the way. You can also create your own ‘display sheets’ by stretching canvas over a wooden frame. This creates the structure that is used as a stage flat. They can be quite large, but are also relatively light.
Virtual sound walls
Then, of course, there is always the ‘use technology’ option. The key here is using a smart board. Keep your wall in one file. You can build up the resources for each phoneme and then add it to the virtual sound wall.
Of course, this is the option for a sound wall that will take up the least space. However, it is also the least accessible, because you have to call up the file every time you want to use it. A ‘hard copy’ sound wall is literally there and the students can refer to it whenever they need to.
Create the resources
You must make the cards you’ll need for the sound wall:
- Create 44 cards to indicate the phonemes.
- Choose one word per phoneme and find a picture that goes with that word. Put these on cards.
- Create cards that feature a few words that contain the sound. Include a picture for each word.
Resources to use with sound walls
Resource 1: Final Consonants R Ending Blends Boom Cards Set 1 from TeachSimple
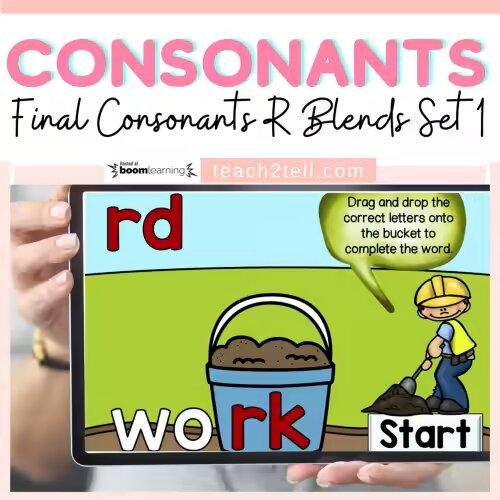
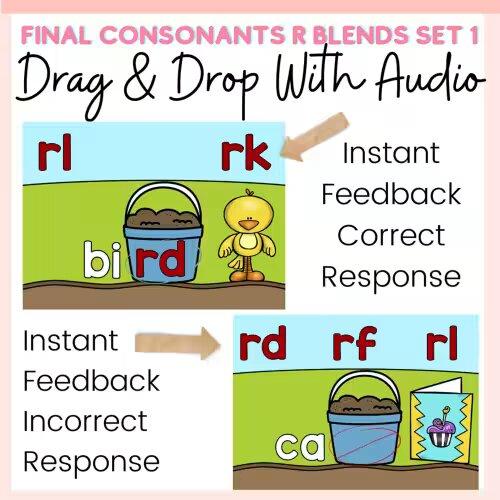
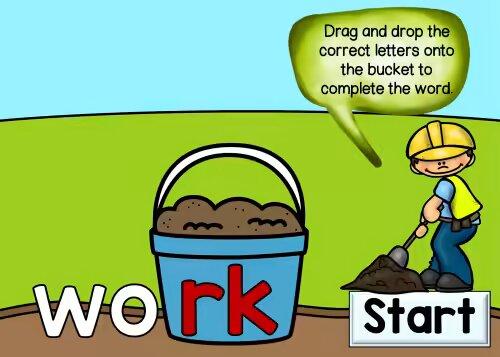
This resource is very focused on the final consonant sound with ‘r’ blends. It consists of a set of 24 cards and instructions for various activities.
It’s suitable for Grades 1 – 3.
Resource 2: Short Vowel Sounds from TeachSimple
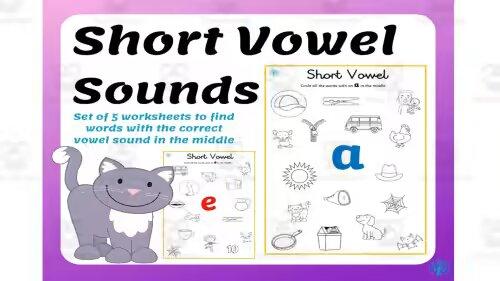
This resource consists of PDF worksheets that put the focus on the short vowel sounds in words. You can use the sheets as a guide to creating cards for the wall.
Resource 3: Ending Sound DTP Worksheet from TeachSimple
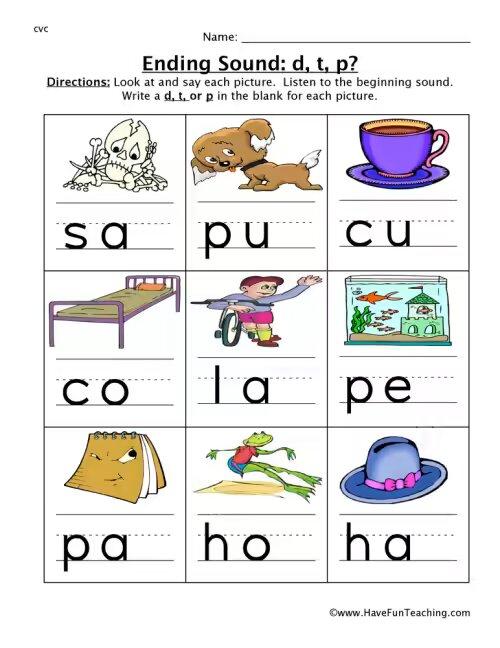
This resource focuses on the ending sounds ‘d’ ‘t’ ‘p’ in simple words. The worksheets with pictures can be useful for a wall. They can also easily be adapted to help the children pronounce the first phonemes in the words.
Sound Wall FAQs
A word wall can be a great resource in the classroom to help students develop their vocabularies. It is also useful for revising spelling. A sound wall, though, is a more effective tool to use when teaching reading. It puts the focus on what the students know and then works from that, rather than beginning with what they should learn.
The purpose of a sound wall is to build up a resource that presents new phonemes as they are learned. It is also important to use it for revising phonemes that have already been learnt. Literally, you build up the sound wall by adding phonemes all the time and not removing any.
A sound wall begins with sounds, but becomes a visual record. It is essential to use images on your sound wall. These are the link between the sounds the students know and the letters, words and pictures that represent them.
Final thoughts
Learning a language is about listening, imitating and making sounds. Learning to read is about recognizing letters that correspond with the sounds. The process of creating a wall is where the two come together. This makes it one of the most useful resources for teaching reading.